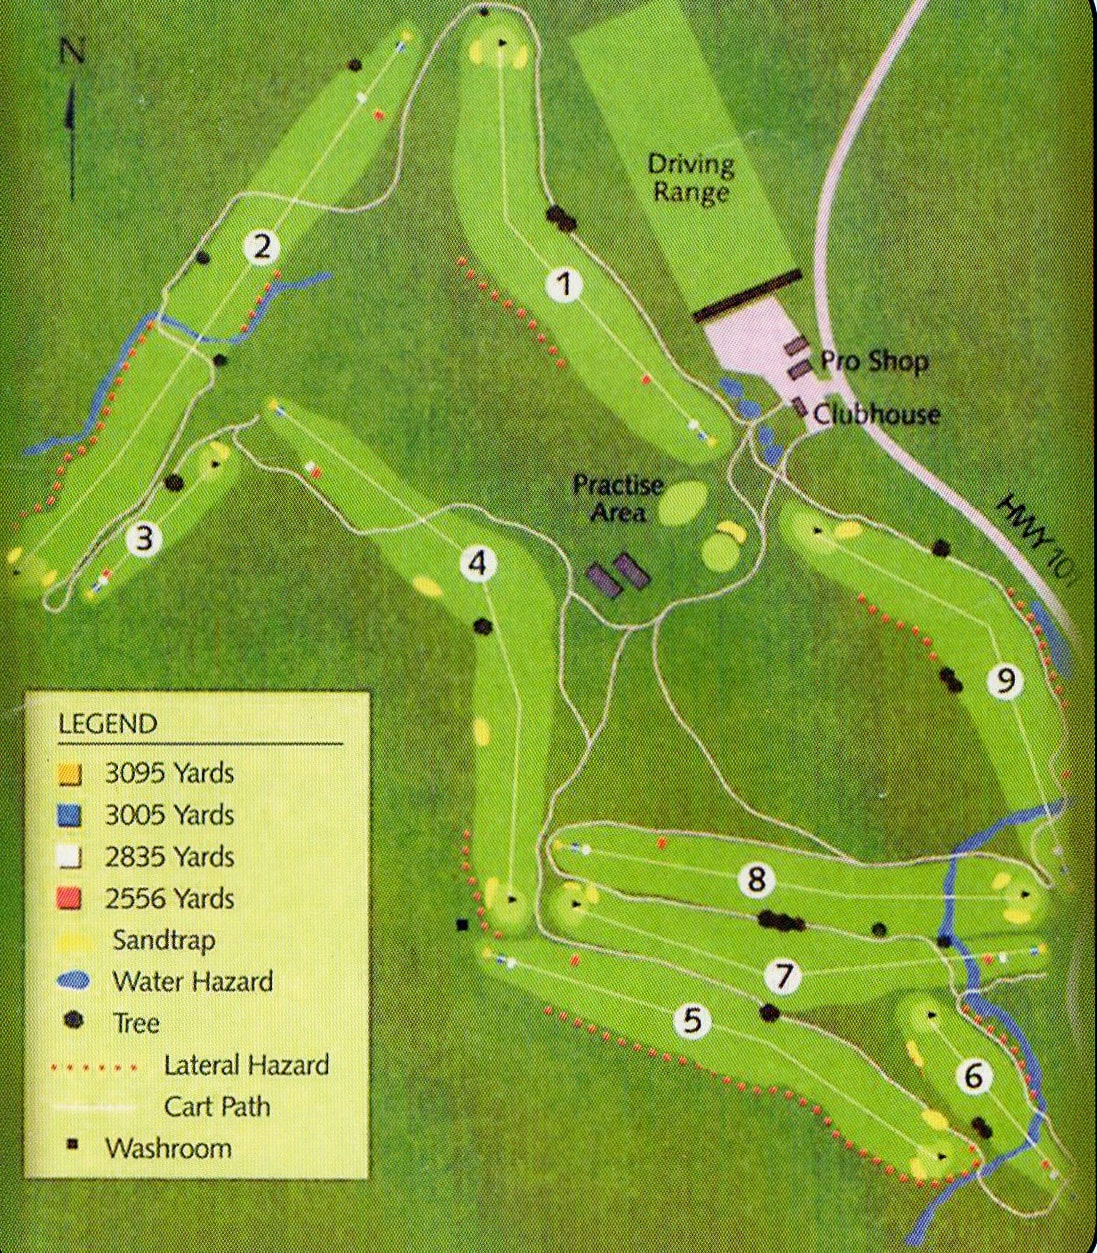
course layout & scorecard
|
Flags
|
Hazard Markers
|
Fairway Markers
|
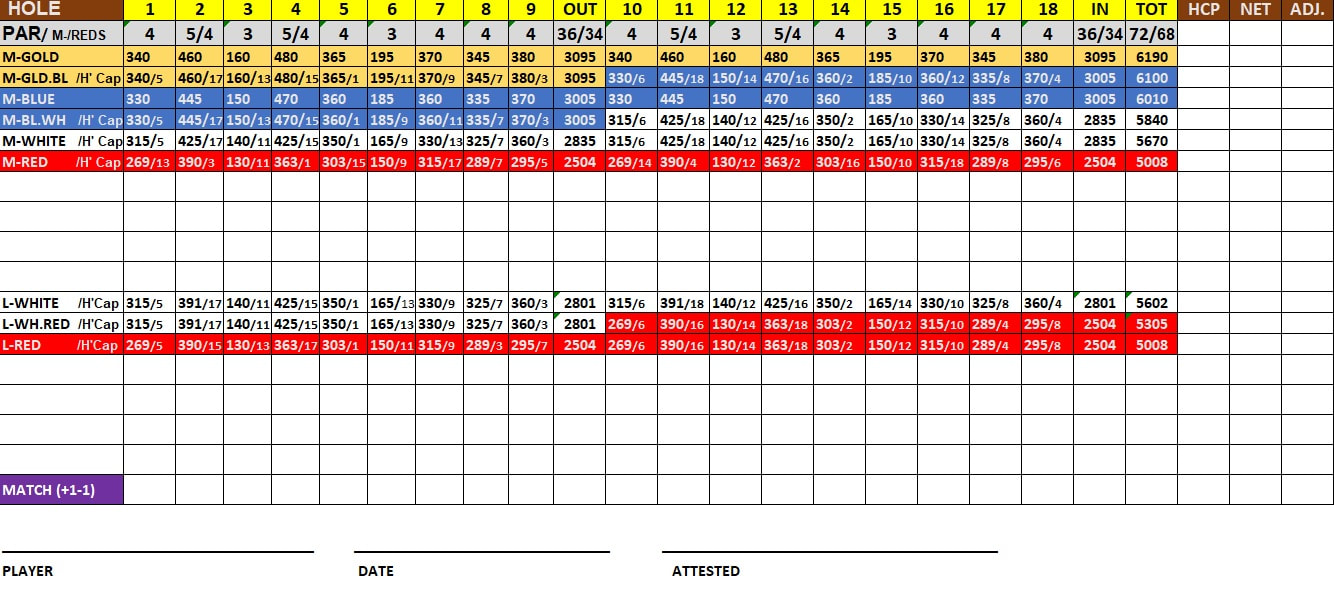
MEN'S |
SLOPE |
RATING |
GOLD/GOLD |
70.4 |
136 |
GOLD/BLUE |
69.9 |
136 |
BLUE/WHITE |
68.5 |
132 |
WHITE/WHITE |
67.6 |
128 |
WHITE/RED |
66.5 |
118 |
RED/RED |
65.4 |
107 |
LADIES |
RATING |
SLOPE |
WHITE/WHITE |
73.2 |
135 |
WHITE/RED |
71.3 |
130 |
RED/RED |
69.4 |
124 |
RATINGS/SLOPES ALL PER RCGA